There are several occasions that require the use of a costume, such as Halloween, Carnival, or simply a costume party. We don’t always have the time or the economic possibility to buy a costume. But this problem can be solved with a bedsheet. In this article, we show you 12 ways to create a costume with a bed sheet. These costumes are easy to make, don’t require sewing, are comfortable to wear, and will look amazing all the time, even if you spend that time dancing.
Content Table
- Ghost
- Sexy Ghost
- Mummy
- Sexy Mummy
- Basic Toga
- Bare Chest Toga
- Greek Chiton
- Princess Leia
- Statue of Liberty
- Aladdin
- Superhero Cape
- Angel
- Final thoughts
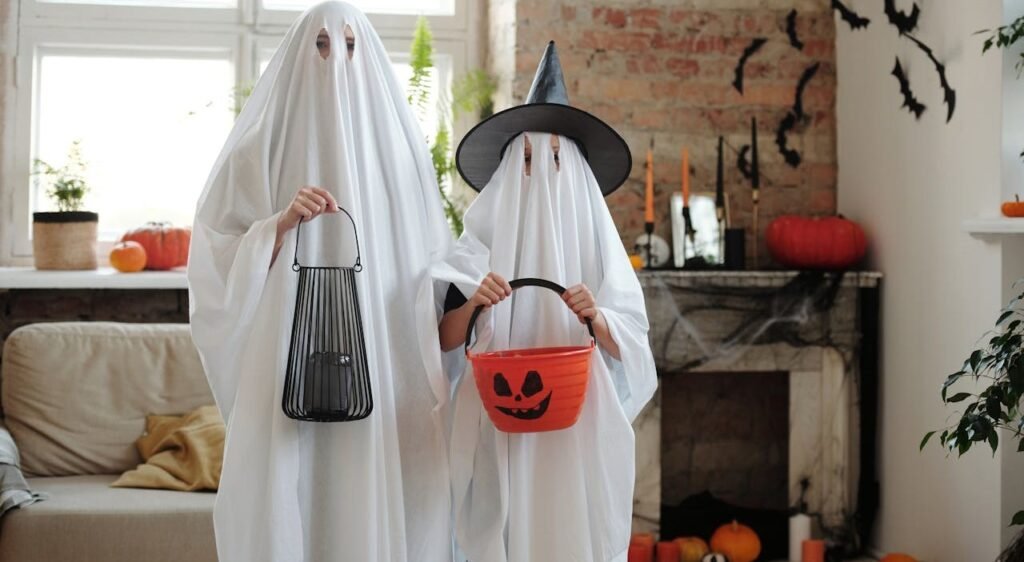
Ghost
What will you need for the ghost costume
- 1 old white sheet (if you don’t have one, you can thrift it)
- 1 light-colored hat
- Scissors
- 3 to 4 pins
- 1 marker
How to make a ghost costume
Step one – Place the sheet over the head of the person who will wear the costume.
Step two – Mark the center of the top of the head, the eyes (two dots), and the mouth or nose if you feel you will breathe better this way. If the sheet is too long for you, also mark the parts you want to cut off at the bottom.
Step three – Remove the sheet and pin the hat to the mark you made over the head. The mark must be on the side that cannot be seen.
Step four – Cut out the eye holes (the holes should be twice the size of the user’s eyes) and the mouth or nose (if desired). You can draw first what you want to cut to make it easier.
Optional: You can customize your ghost by adding accessories such as a hat, a crown, glasses, a tie, a bow, or a necklace. You can write a phrase like “hole sheet”, “oh sheet”, “sheet happens”, “this is boo sheet”, “you can’t make this sheet up”, “Twix or treat”, “spook ya later”, or “I’m here for the boos” with a marker or vinyl sheets. You can also create a Charlie Brown ghost by drawing black spots on your sheet or using vinyl sheets.
Sexy Ghost
Follow the steps for making a ghost costume (see above) but cut the sheet shorter. Place the sheet over the head of the person who will wear the costume, mark where you want to cut, remove the sheet, and cut it. Then, wear some sexy tights underneath and pair them with sexy heels.
Mummy
What will you need to make a mummy costume
- 1 or 2 old white sheets (if you don’t have them, you can thrift them)
- Scissors
- Coffee or tea
- Base outfit (preferably white pants and a long-sleeved shirt)
- Optional: sewing machine, hot glue, or fabric glue.
How to make a mummy costume
Step one – Stretch the sheet on a flat surface. With a pair of scissors, cut 2 to 3-inch slits down the side of the sheet and then tear off the rest to give the mummy a better look. The strips do not all have to be the same size, as the look of a mummy is better asymmetrical. If you want, you can even try to damage the sides of the strips a little with a fork to give them an old look.
Step two – Dye the strips with coffee or tea to give them an old look. Place all the strips in a large pot with water, mix in coffee or tea, and soak for 30 minutes to an hour. After this time, let the material dry.
Step three – You have 3 options: you can sew the fabric to your base, use knots, or glue.
Sewing
- Sew the strips around the long sleeve shirt.
- Rip up the inner seam of your sleeves and pants so you can sew the strip without worrying.
- Turn the sleeves and pants inside out and sew them back.
- This way, you will have more work but also a more stable costume.
Knot
- Tie 5 strips together with a strong knot (this will give a cool texture to your costume).
- With your base outfit on, start wrapping the strips around your body, beginning with your legs, overlapping or tying the strips to secure them.
- Be careful wrapping the pelvis area and don’t wrap it above the waistline of your pants. You have to do it in a way where you feel comfortable going to the bathroom if needed.
- Then wrap the waist, shoulders, and finally the arms.
- You can also wrap your fingers and head if you want to.
Glue
- Start wrapping and gluing the strips to your base outfit following this specific order: legs, waist to shoulders, and arms.
- If you use hot glue, be careful not to burn yourself. The best way to do it is with cardboard to put between your skin and the fabric with glue, so you don’t hurt yourself.

Sexy Mummy
What will you need to make a sexy mummy
- 1 old white sheet (if you don’t have one, you can thrift it)
- Scissors
- Coffee or tea
- Base outfit (for the upper part can be an old crop top or old bra and for the lower part can be old shorts or a skirt, preferably white)
- Optional: sewing machine, hot glue, or fabric glue.
How to make a sexy mummy
To create a sexy mummy, you will need to follow the same steps as making a regular mummy (see above). The main differences are that you will need fewer sheet strips and a different base outfit. Then, simply sew, wrap, or glue the strips onto your base outfit.

Toga
There are several ways to make a toga using a sheet. Here, we will teach you the three coolest ones, considering your comfort and the stability of the costume, so you can dance all night if you want to without worrying about the costume falling apart.
Basic Toga
What will you need to make a basic toga
- 1 white sheet (if you don’t have one, you can thrift it)
- 1 golden rope, ribbon, or cord
- Optional: a pin or a brooch
How to make a basic toga
Step one – With your right hand, grab a corner of the sheet and place it on your right shoulder (you can also use your left hand and left shoulder). Don’t forget to leave about 7 inches of the corner of your sheet in your hand to tie a knot later.
Step two – With the other hand, wrap the sheet around your body twice, covering the chest area and down, and ending at the back of the shoulder that you chose in the first step.
Step three – Tie the corners of the sheet over your shoulder in a tight knot. You can also use a pin or a brooch for added security.
Step four – Use a golden rope, ribbon, or cord around your waist and tie it with two knots.
Observations: If the sheet is too long for you, you can fold one of the sheet edges around 7 inches or whatever seems more appropriate to you and try again. Adjust again if you need to until you have the perfect size for you.
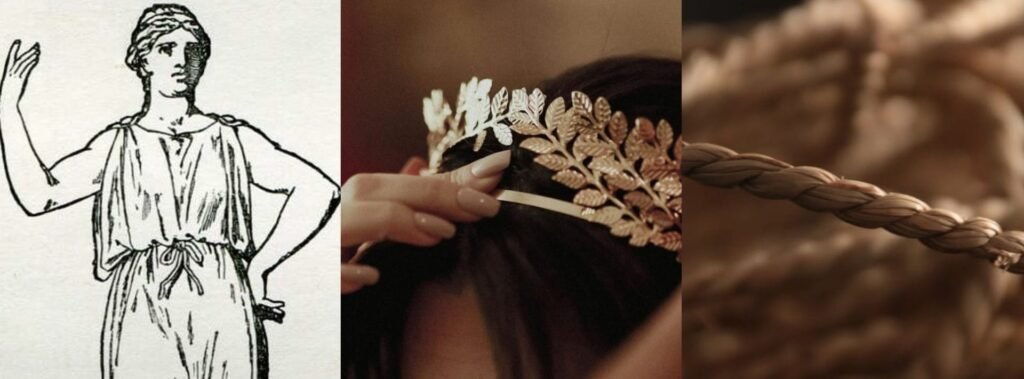
Step five – Accessorize with golden jewelry, a Greek crown, and Greek sandals.

Bare Chest Toga
What will you need to make a bare chest toga
- 1 white sheet (if you don’t have one, you can thrift it)
- 1 white crop top (for women)
- Optional: a pin or a brooch
- 1 golden rope, ribbon, or cord
How to make a bare chest toga
Step one – Grab two side-by-side corners of the sheet on one short side and tie them together in one or two strong knots. You can use a pin or a brooch to secure it better if you feel the need.
Step two – Put the knotted side of the sheet through your head and right arm, leaving the knot over your left shoulder (or left arm, right shoulder).
Step three – Grab the bottom corners of the sheet, bring this entire side of the sheet to your hips, place it around your hips, and tie them in a knot on the hip that is on the same side as the shoulder with the knot (or waist for women if you prefer).
Step four – Use a golden rope, ribbon, or cord around your hips and tie it with two knots. If you are a girl, wear a crop top, preferably white, to cover the chest area.
Step five – Accessorize with golden jewelry, a Greek crown, and Greek sandals.

Greek Chiton
What will you need to make a Greek Chiton
- 1 white sheet (if you don’t have one, you can thrift it)
- 1 pin or brooch
- 1 golden rope, ribbon, or cord
How to make a Greek Chiton
Step one – Fold your sheet to the desired length, whether it is a long Greek chiton (reaching the ankle) or a short Greek chiton (knee-length or shorter).
Step two – Fold the sheet in half widthwise around your body, positioning it under your arms. One half of the sheet will cover your back, and the other half will cover your front.
Step three – Secure the back and front of the sheet together with two pins, one over each shoulder. Place the pins in a way that the chiton drapes across your clavicle without slipping off your shoulders.
Step four – Place pins on the open side, leaving a small opening for your arm to pass through.
Step five – Use a golden rope, ribbon, or cord around your waist and tie one or two knots.
Step six – Accessorize with golden jewelry, a Greek crown, and Greek sandals.
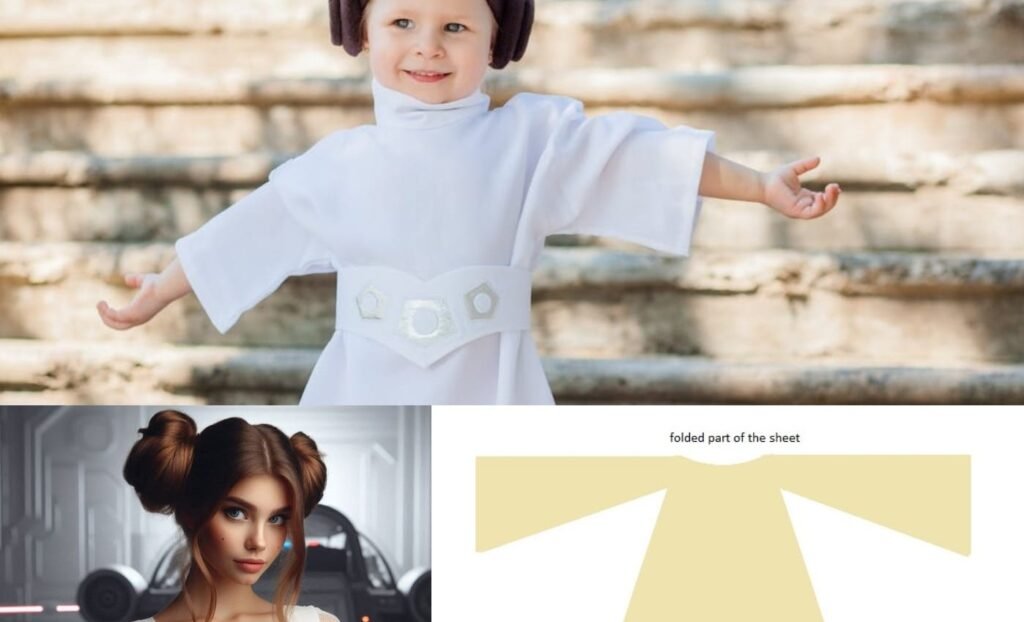
Princess Leia
What will you need to make a Princess Leia costume
- 1 old white sheet (if you don’t have one, you can thrift it)
- Scissors
- Hot glue
- 1 silver rope, ribbon, cord, or belt
How to make a Princess Leia costume
Step one – Fold the sheet in half.
Step two – Lay the person who will wear the costume on the sheet with their arms open, their neck in the fold part, and their head outside the sheet to create a pattern for the dress.
Step three – Draw the outline of the dress on the sheet around the person.
Step four – Cut out the drawn pattern without unfolding the sheet and without cutting the folded part.
Step five – Cut a small hole on the folded part for the head.
Step six – Glue all the sides together, excluding the holes for the head, arms, and legs. Use plenty of glue and press it down. Then fold the costume inside out.
Step seven – Tie a silver rope, ribbon, cord, or belt around the waist and style the hair like Princess Leia.
Statue of Liberty
What will you need to make a Statue of Liberty costume
- 1 green sheet (if you don’t have a green sheet, you can thrift one)
- Optional: a pin or a brooch
- Green poster board
- Green paint
- 1 yogurt cup
- 1 cardboard tube
- Red, orange, and yellow tissue paper
How to make a Statue of Liberty costume
Step one – Make a basic toga with the green sheet (see instructions above) or choose another toga style if you prefer.
Step two – Print out the Statue of Liberty crown design or draw it and use it as a template.
Step three – Using the template, draw the crown on the green cardboard and cut it out.
Step four – Make two small holes on the side tips and tie a yarn or string in each hole, to then tie the crown to your head.
Step five – Paint the yogurt cup and the cardboard tube green. Then glue the two together to make the torch.
Step six – Glue some red, orange, and yellow tissue paper inside the yogurt cup (red around the edges, orange and yellow in the middle), allowing the ends to stick out of the yogurt cup to create the flame.

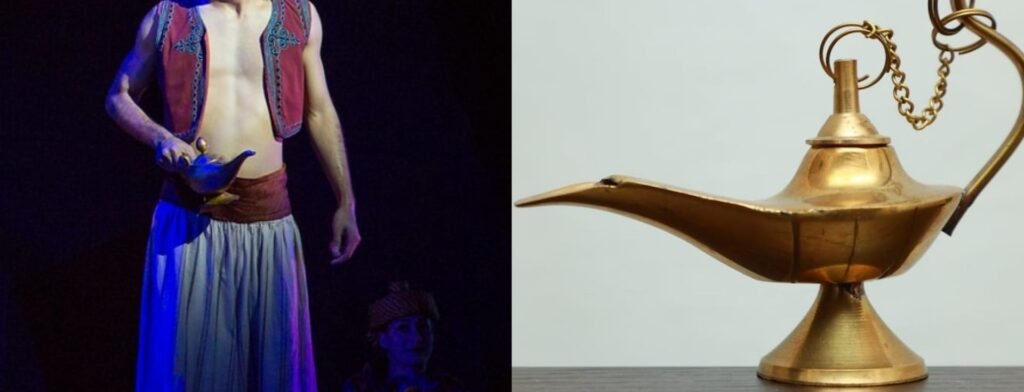
Aladdin
What will you need to make an Aladdin costume
- 1 white sheet (if you don’t have one, you can thrift it)
- 1 white pillowcase (if you don’t have one, you can thrift it)
- Leggings
- 1 vest
How to make an Aladdin costume
Step one – Put on your leggings and wrap the central part of the longest side of the sheet around your waist (front to back), covering your legs. Adjust it at the waist and tie it at the back, letting the rest of the fabric drape.
Step two – Take the fabric that reaches your feet (front) and bring it to the back of your waist, passing it between your legs. Wrap it around your waist, bring it to the front, and secure the left side of the sheet to the right side with a pin (you can also hold the entire sheet that is there on the front with this pin).
Step three – Pull the excess fabric from between your legs to the front of your body and tuck the corner into the fabric around your waist.
Step four – Fix the sheet on the legs and tuck the sheet into your leggings at the bottom, leaving a bit of the lower leg exposed.
Step five – Tie your hair into a bun, place the pillowcase on your head, like you do after a shower, roll the rest of the fabric in front and place the end inside the pillowcase (on the corner of your forehead).
Step six – Use a vest.
Step seven – You can use a brooch or a feather in the headpiece and use a lamp or make one out of poster board.
Superhero Cape
What will you need to make a superhero cape
- 1 old sheet, preferably a strong color (if you don’t have one, you can thrift it)
- Scissors
- 1 marker
- Creativity
How to make a superhero cape
Step one – Fold the sheet in half. Draw the design shown in the image on the sheet (the part with 31 inches stays in the folded part of the sheet) and cut it out (do not cut the folded part). If you have a sewing machine, you can sew the edges if you prefer.
Step two – Get creative with decorating your cape. Here are some tips:
- Use vinyl sheets, cardboard, or a marker to create a design on the back (it can be a known design or one invented by you).
- Use the rest of the fabric from the sheet to make a belt or bracelets that you can tie with a knot.
- Use or create accessories like a mask or a cool object to channel your superhero power.

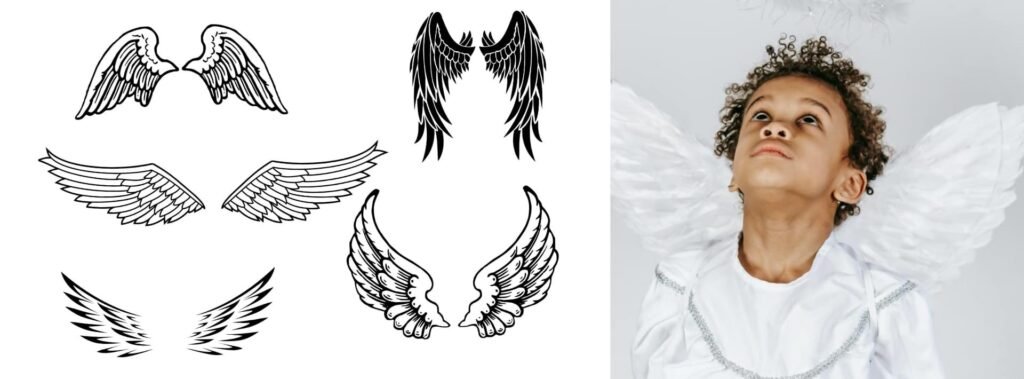
Angel
What will you need to make an angel costume
- 1 white sheet (if you don’t have one, you can thrift it)
- Scissors
- 1 rope, ribbon, cord, or belt
- 1 halo and 1 pair of wings (we will teach you how to make them in case you don’t have them)
How to make an angel costume
Step one – Fold the sheet in half and draw half a circle on the folded part, sized appropriately for your head. Normally, it’s 6×3, but you can start by making it smaller. If it’s too small for you, you can always adjust it.
Step two – Put your head through the hole and use a rope, ribbon, cord, or belt around your waist.
Step three – Trim off any excess fabric if needed.
Alternative – You can also opt for one of the togas instead.
Step four – Accessorize with a halo. You can make one if you don’t have one with a gold or silver pipe cleaner or paper and wire.
Step five – Accessorize with wings. If you don’t have any, you can craft them with poster board. Draw the type of wings you want for your angel, cut them out, and then decorate them with whatever you want, such as glitter, feathers, strips of paper, or fur.
Final thoughts
Now that you have been inspired by 12 cool ideas to make a costume out of a bedsheet, you just have to choose your favorite one and have fun creating it. You will look great and be comfortable at any party. Have fun!
Articles you may be interested in:
“What Are Organic Sheets And Are They Worth It? Everything You Need To Know“